Setting Up an Export Event
To set up a scheduled export event:
-
Select Transaction Manager > Administration on the Foundry Menu.
-
Use the Scheduler menu link or select Scheduler from the Administration dropdown control to launch the Scheduler start page.
-
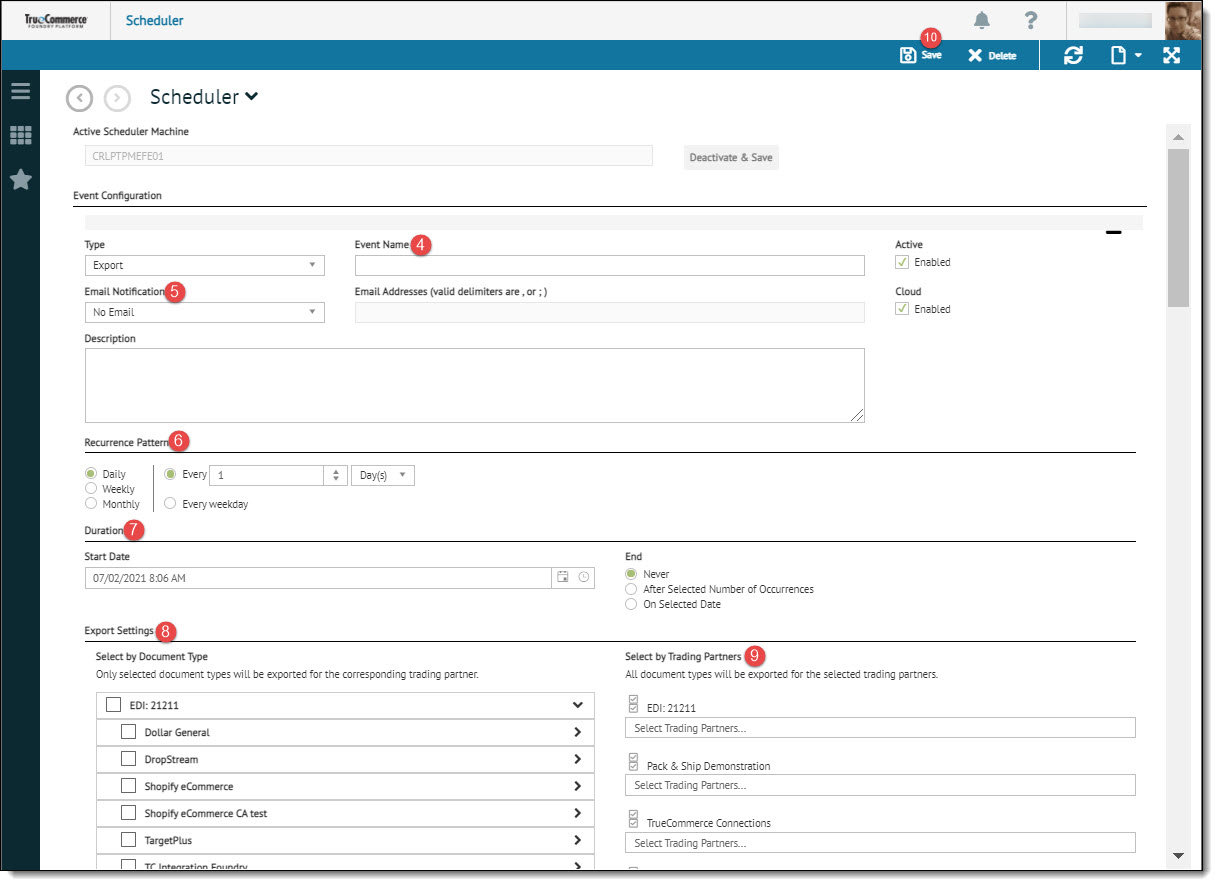
Click New on the action bar to create a new, customized export event.

This launches the event configuration page.

Note that when using a Cloud BSP (QuickBooks Online, Sage X3, or NetSuite), it will not be necessary to activate a scheduler machine when setting up a cloud event. In this case, the Active Schedule Machine field is grayed out. -
Select Export for the event Type option, and then enter your Event Name and Description. Note that fulfillment events to Pack & Ship can be scheduled from the Transactions Inbox via a Purchase Order (850) or other inbound documents. Logic is included in Transaction Manager to exclude documents that have already been sent via Pack & Ship.
-
Choose an Email Notification option and enter one or more Email Addresses (comma separated if applicable). The email addresses that received a notification will appear in the Transaction Manager Activity Log.
-
Under Recurrence Pattern, select the frequency of the scheduled event.
-
Under Duration, select the start and end date/time.
-
Select a Document Type. Only selected document types will be exported to the corresponding trading partner.
-
Select the Trading Partners applicable to this event processing.
-
Click Save on the action bar save your changes. The new event is added to the Configured Events list on the Scheduler start page, where you may select it be edited at any time
Related Topics