Transaction Manager Scheduler
Transaction Manager Scheduler is a built-in tool that can be purchased as an add-on for automating recurring segments of your EDI business process flow. This includes actions performed within Transaction Manager and procedures shared with your integrated ER package. These actions and procedures are generally referred to as "events."
For integrated business systems, Scheduler can leverage a single connection to your business system to automatically export newly-received Transactions from your Trading Partners into the system, creating the documents within your business system to be accessed and reviewed by your accounting team, as well as importing any pending documents within your business system that are ready to be sent to your Trading Partner.
Example: You can set up an event in Scheduler to import your SNPs every day on the half hour. In this case, it will run every half hour looking into your ERP and the import folder (flat file integrations) to import those transactions automatically.
For flat-file integrations (csv, xml, txt, etc.) Scheduler can be set up to monitor a file path (local/network drives or FTP) to import or export files automatically as needed.
|
CAUTION Scheduled events do not eliminate the need for user interaction and accountability regarding any of the processes pertaining to Transaction Manager. You are still responsible for verifying that proper data is being sent, monitoring Transaction Manager for errors/failures, and validating data from your trading partners. |
If you do not have access to the Scheduler add-on, contact your system administrator to ensure you have permission settings for the functionality to perform your work.
Scheduler Start Page
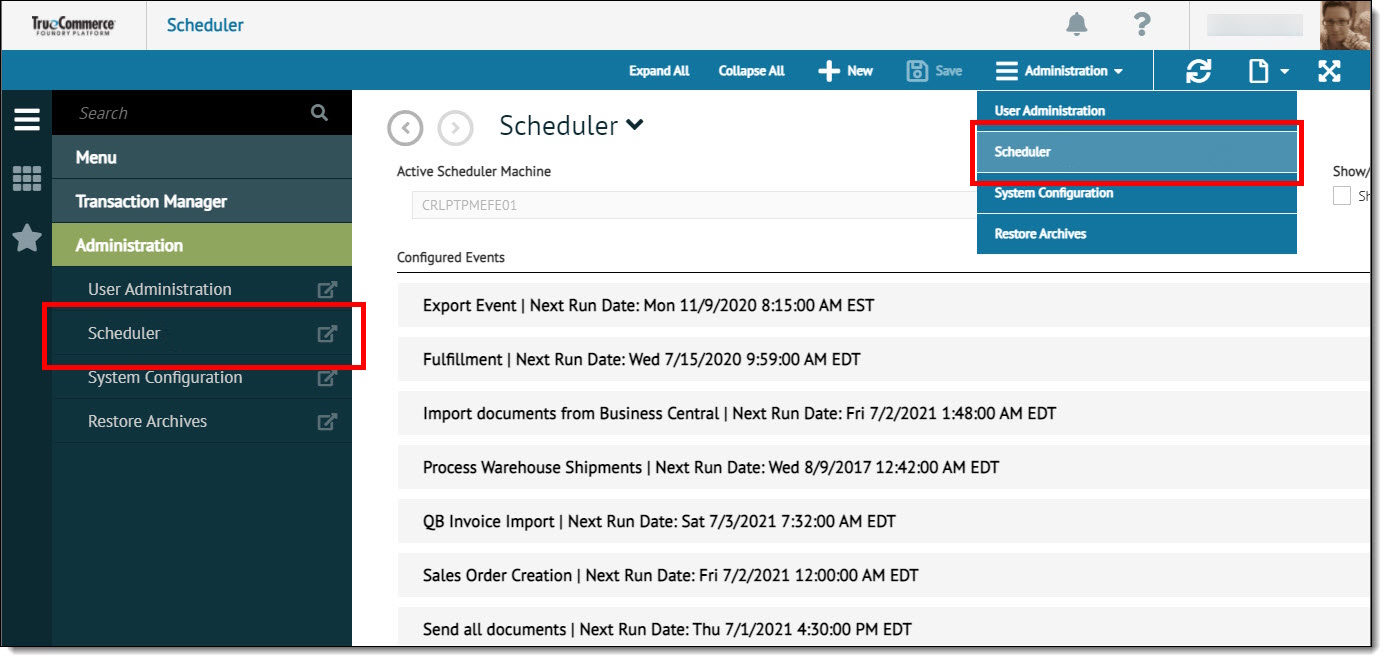
Scheduler is accessed via Transaction Manager > Administration on the Foundry Menu. Use the Scheduler menu link or select Scheduler from the Administration dropdown control. The launches the Scheduler start page to view, create and edit your scheduled events.

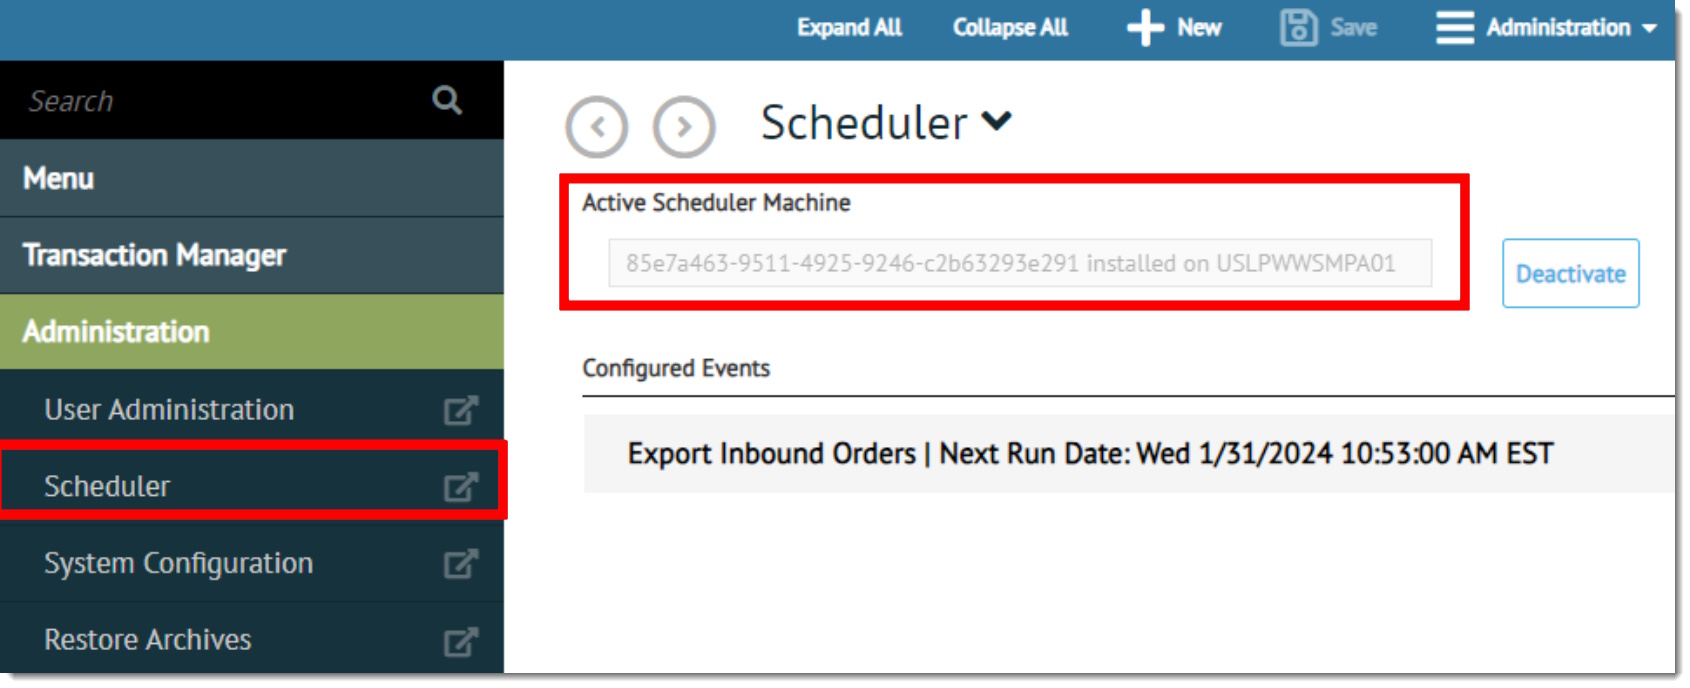
Active Scheduler Machine
For local-based integrations, the Active Scheduler Machine field at the top of the the start page is needed to specify the workstation or server responsible for keeping track of scheduled events and their timing, as well for maintaining connections to your system.

If Scheduler has not been activated for use, you will need to enter a machine name in this field. Contact your system administrator if you need assistance identifying your machine name. This is not a requirement for cloud-based Scheduler.
Event Configuration
If you already have some scheduled events, they will be listed in this section of the Scheduler start page. From here, you can select an event to view, rename or make changes to the configuration.
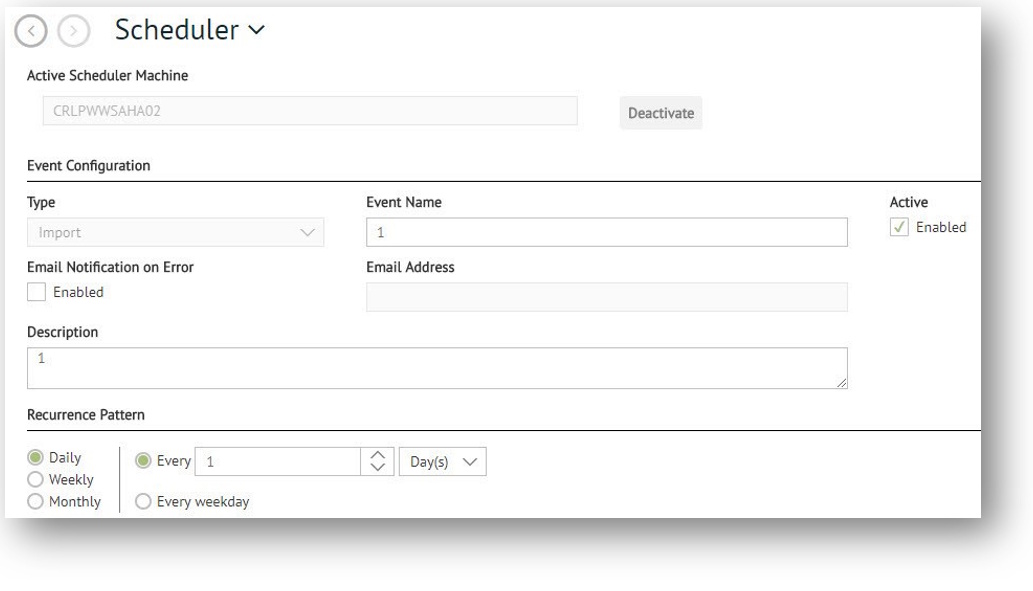
To create a new event, click New on the action bar to open the configuration page.
Remember to click Save on the action bar to save your changes.
This section describes some general configuration options. Refer to the links under What can I do? at the bottom of this page for complete details on viewing, creating, editing and deleting your scheduled events.

Types of Scheduled Events
The table below lists the types of events that are applicable to this feature, under Type on the configuration page. Note that transactions are received automatically in Transaction manager. As such, there is no need for a scheduled Receive option. The type selected will change the settings required for the event.
|
Event |
Description |
|
Send |
Sends transactions in the Outbox to the TrueCommerce network. Automatically avoids transactions with errors or missing required data. |
|
Export |
For flat file integrations, generates a file in the specified export directory with data from transactions in the Inbox. For framework integrations, creates a document in the user's accounting package with data from transactions in the Inbox. See Scheduled Export Event. |
|
Import |
For flat file integrations, creates transactions in the Outbox using data from files found in the specified import directory. For framework integrations, creates transactions in the Outbox using data from documents in the user's accounting package. Note that if the Framework Integration fails, the flat file export will not occur. See Scheduled Import Event. |
|
Import/Send |
Combines Import and Send into one action |
|
Report |
Generates an updated report (PDF or Excel file) based on the saved report type specified. Includes the option to send as an email. See Automate Reports. |
|
Inventory Import |
Imports Inventory from your Integrated Business System creating an Inventory Report (846) in your Outbox |
|
Inventory Import/Send |
Combines Inventory Import and Send into one action |
Email Notifications
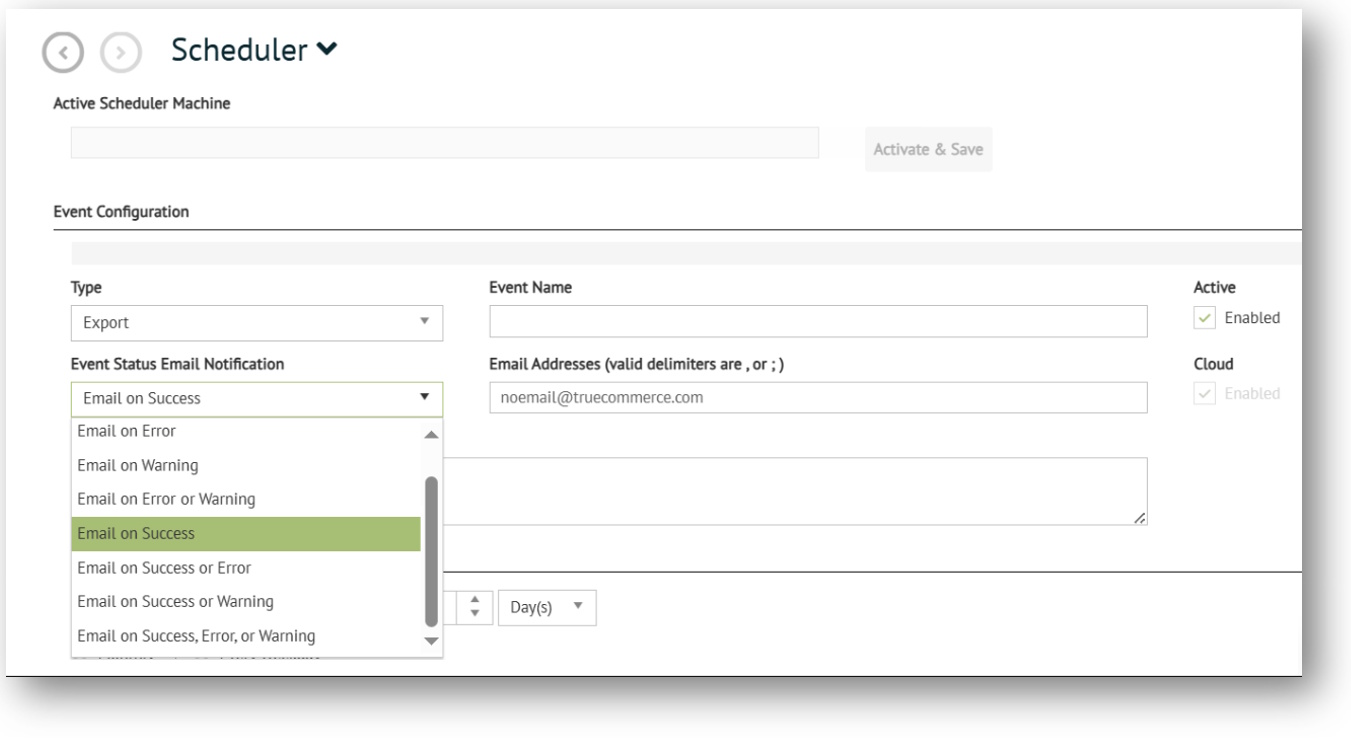
Scheduled events can be configured to email a status message upon completion. You can set notifications specific to warnings, errors, or either status under Event Status Email Notification on the configuration page. Multiple email addresses are supported.

The table below lists the different settings applicable to this feature.
|
Notification Type |
Description |
|
Email on Error |
Notify when an error has occurred during this Scheduled Event resulting in the event failing |
|
Email on Warning |
Notify when a non-failing warning is raised for this Scheduled Event |
|
Email on Error or Warning |
Notify on either Error or Warning |
|
Email on Success |
Notify when the event is successful |
|
Email on Success or Error |
Notify on either Success or Error |
|
Email on Success or Warning |
Notify on either Success or Warning |
|
Email on Success, Error or Warning |
Notify on any event status |
Upon successful completion, the email notification will confirm whether there are transactions ready for pick-up (if in flat file format) or if they are in the user's business system.

Suspending an Event
If necessary, you can halt the processing of a scheduled event (remove it from the queue) by deselecting the Active checkbox on the configuration page (when editing the event).
Related Topics
eLearning Resources