Setting Up an Import Event
If Transaction Manager is integrated with a business system, the scheduled import usually involves the selection of a integrated transaction search that has been created and saved prior to configuring the event.
To set up a scheduled import event:
-
Select Transaction Manager > Administration on the Foundry Menu.
-
Use the Scheduler menu link or select Scheduler from the Administration dropdown control to launch the Scheduler start page.
-
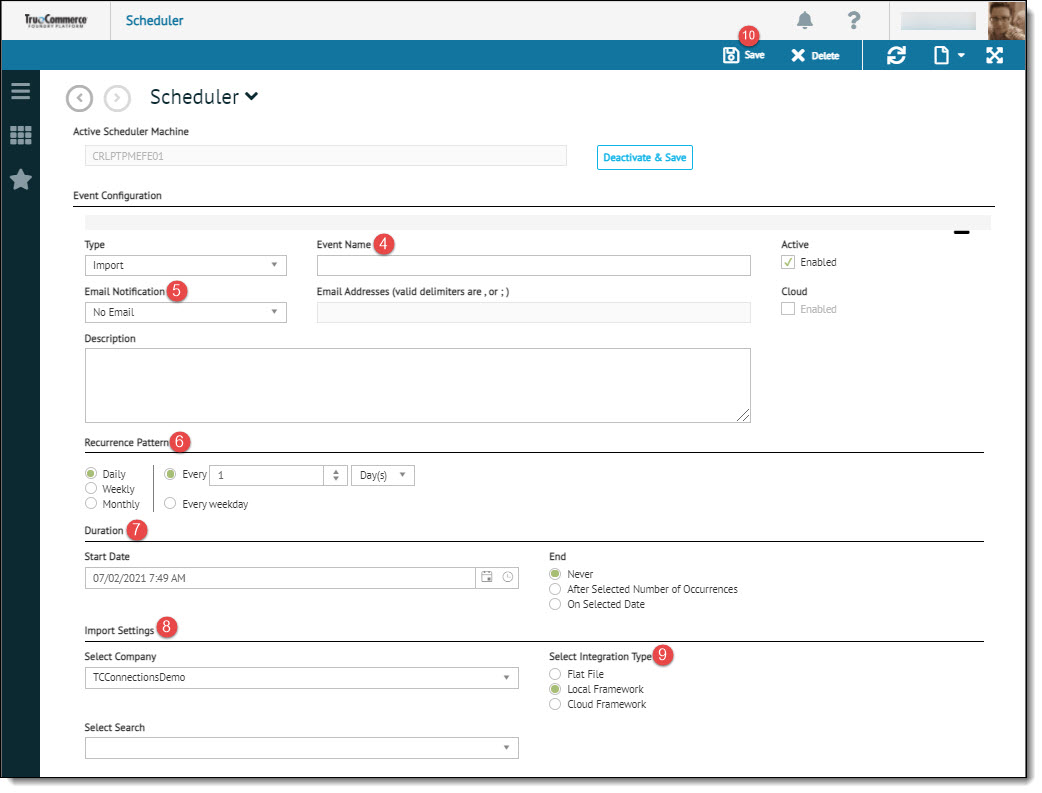
Click New on the action bar to create a new, customized import event.

This launches the event configuration page.

Note that when using a Cloud BSP (QuickBooks Online, Sage X3, or NetSuite), it will not be necessary to activate a scheduler machine when setting up a cloud event. In this case, the Active Schedule Machine field is grayed out. -
Select Import for the event Type option, and then enter your Event Name and Description.
-
Choose an Email Notification option and enter one or more Email Addresses (comma separated if applicable). The email addresses that received a notification will appear in the Transaction Manager Activity Log.
-
Under Recurrence Pattern, select the frequency of the scheduled event.
-
Under Duration, select the start and end date/time.
-
Select a Company from the dropdown options.
-
Select an Integration Type. One or more options will be available based on your integration setup:
Flat File - BSP has mapped flat file integrated documents (imports all listed)
Cloud Framework - BSP has mapped cloud framework documents (NetSuite, QuickBooks Online, Sage ERP X3)
Local Framework - BSP has mapped local framework documents (QuickBooks, Sage 100, SAP) -
For Cloud and Local Frameworks, use the Select Search dropdown to specify the integrated transaction search that will identify which transactions are to be retrieved for this event.
-
Click Save on the action bar save your changes. The new event is added to the Configured Events list on the Scheduler start page, where you may select it be edited at any time.
Related Topics