Enabling Auto Selection
When enabled, the Auto Selection feature automatically imports all non-processed transactions based on the settings defined in the Invoice Search Period. See Defining the Invoice Search Period for more information.
To enable Auto Selection:
-
Select Transaction Manager > Business System on the Foundry Menu to launch the Business System workspace.
-
Select the company name from the business system dropdown to access the associated Business System Company Setup.
-
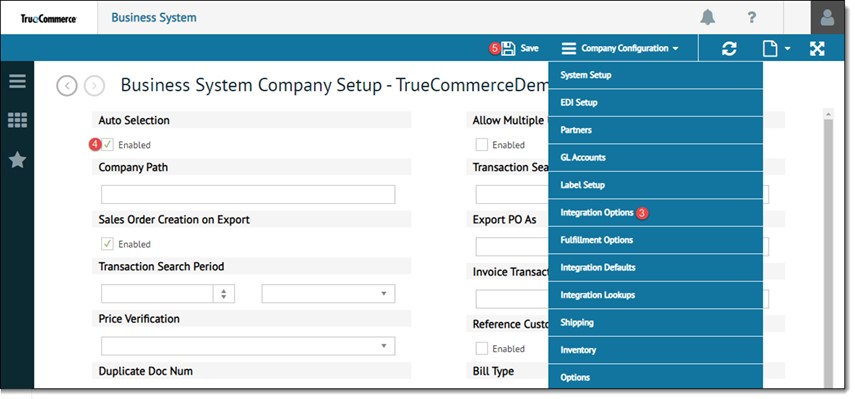
Select Integration Options from the Company Configuration dropdown control.
-
Select the Auto Selection checkbox.

-
Click Save on the action bar to save your changes.
Related Topics