Adding User Defined Fields
Three user-defined fields (UDFs) are available for you to customize the transaction information you see on the Transactions Grid. Use this feature to add data items (per trading partner and transaction type) that are not already displayed as columns on the grid. It allows you to show more values in the transaction record, without the need to open Transaction Details.
This section explains how to display UDF columns to the Transactions grid and how to configure the user-defined fields for display in your transactions.
Viewing UDF Columns
When user defined fields are configured for your transactions, you can add those columns to the Transactions grid by right clicking the vertical ellipsis and then selecting the Columns checkboxes for User Defined Field #1, User Defined Field #2, and/or User Defined Field #3. See Modifying the Grid Display for more about rearranging columns and rows.
![]()
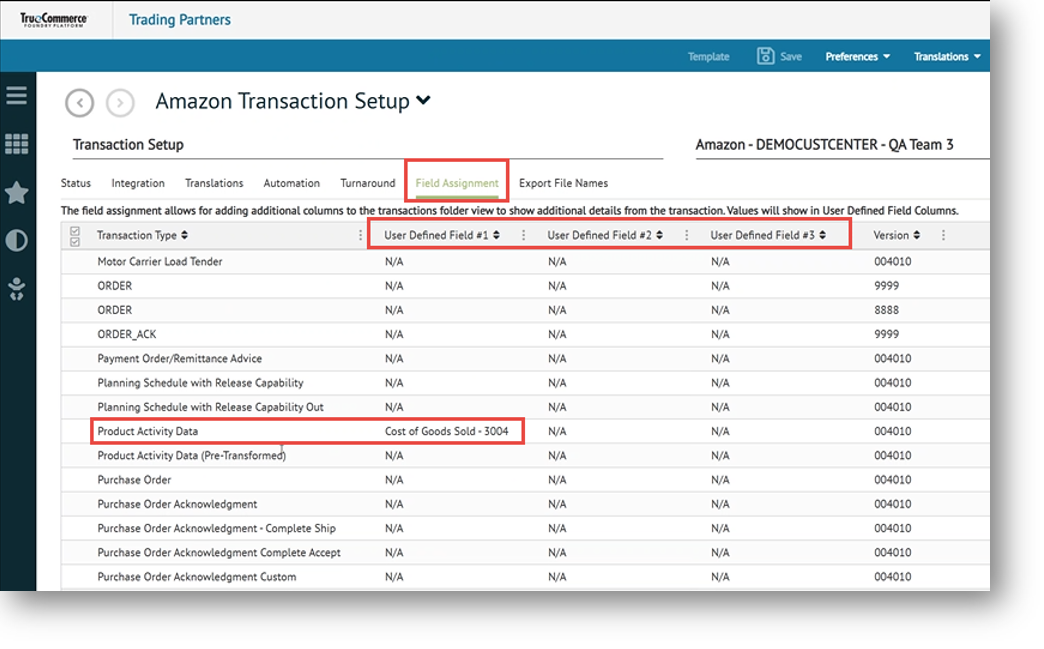
Configuring UDFs for a Document
To add a UDF to a transaction/document type:
-
Select a trading partner for editing.
-
Select Preferences on the action bar and then select Transactions from the dropdown options. The Transaction Setup grid displays in the Trading Partners workspace.
-
Under the Field Assignment tab, enter the new field description at the User Defined Field #1, User Defined Field #2, or User Defined Field #3 column for the Transaction Type in question.
-
Select Save on the action bar to save your changes.
Information for the newly added field will appear at the associated UDF column (User Defined Field #1, User Defined Field #2, or User Defined Field #3) whenever the associated transaction appears on the Transactions grid.
Related Topics