Partner Maps
The Partner Maps tab on the Mapping Manager Maps page is the primary workspace for accessing the documents mapped between a specific project and Transaction Manager. It lists all maps configured for each of the trading partners associated with your project.
Select a record from the grid to access the field-token mappings of a specific document.
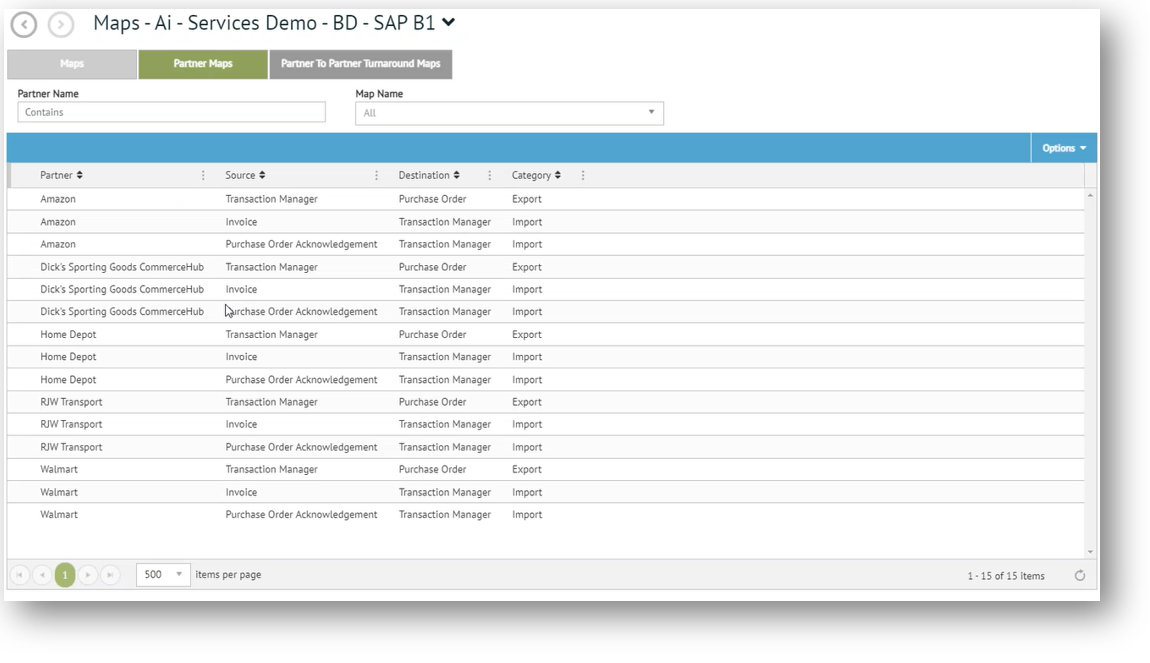
Columns on the grid identify the Partner, Source, Destination, and Category for each of the different transaction types (Invoice, Purchase Order, Standard ASN, and others) that are mapped for your project.
Category Type
Note that the Category column identifies the direction of the transaction, where Export is a document type that exports out of Transaction Manager, and Import is a document type that imports into Transaction Manager from your project's ERP.
Grid Functionality
This grid includes various functionality for locating and accessing the different maps listed under this tab.
Filtering Records
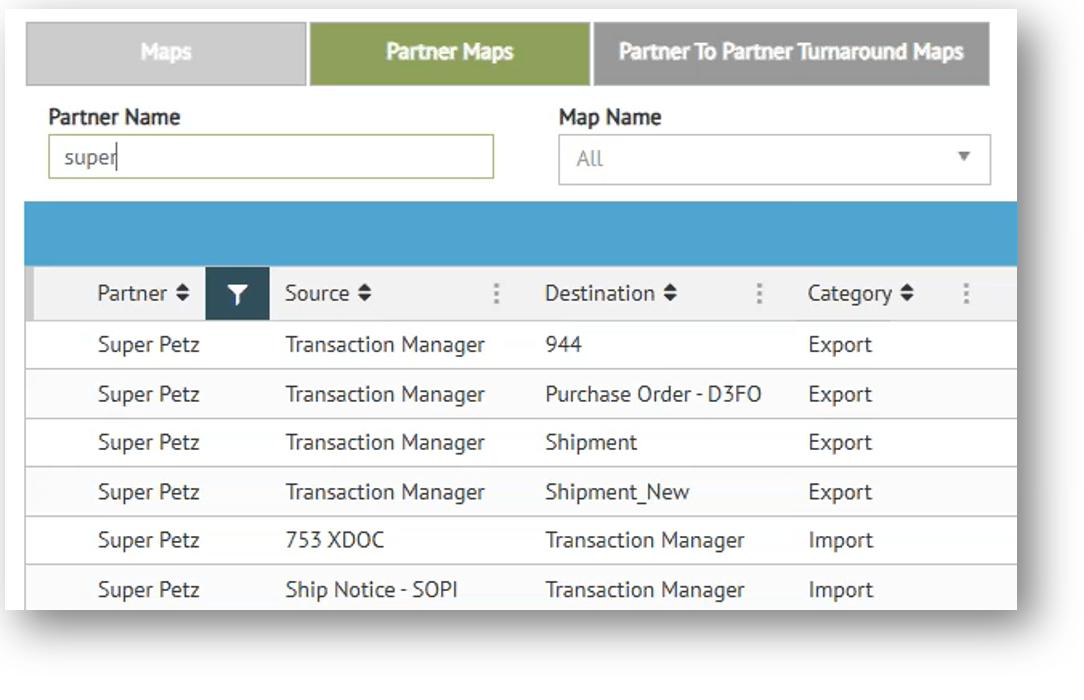
If your project contains a large number of maps you can filter them by Partner Name and/or Map Name using the two search fields above the grid.
Using Grid Controls
Standard grid functionality, such as the vertical ellipsis, can be used to hide, sort and/or rearrange your grid configuration, as described under Working with Grids in the Platform User Guide.
Editing Maps
Click Edit on the control bar to view and/or modify a selected map. For example, selecting a Target Purchase Order record for editing would immediately launch the Mapping - Target - Purchase Order page. See Mapping for documentation on editing mapped components.
Partner Maps Control Bar
The Partner Maps grid has the following controls and options for working with selected map records.

|
Edit |
Launch the Mapping page to edit the map selected. |
|
Rules |
Access Line Item Conversions for the map selected. See Rules. |
|
Save |
Save changes. |
|
Reset |
Undo your most recent changes. |
|
Delete |
Remove the selected map from your project. You must click Save to permanently remove the selected map. |
Options
Drop down menu options:
|
Lookups |
Open the Lookups page to add or make changes to lookup tables associated with a selected partner map. For details, see Lookups. |
|
NOTE The same action bar controls are available for all Projects and Maps pages in Mapping Manager. |
Accessing Maps
To access a map:
-
Select your project from the Projects grid.
-
Click Edit on the grid control bar to launch the Maps page associated with the project you selected.
-
Ensure that the Partner Maps tab is selected at the top of the Maps page to view the Partner Maps associated with your project.
-
Select a record from the Partner Maps grid and then click Edit on the control bar to view and/or modify the selected map.
What can I do?
-
Edit a selected map
-
Create and assign lookup tables in partner maps
-
Create and modify rules
Related Topics