Search/Filtering Transactions
The Transactions workcenter has different tools available for you to find something quick, reduce the number of records displayed on the grid, and/or organize the display of your transactions into logical groupings and workflow. Basic search/filtering options include:
Use these features to locate specific transactions or sets of transaction types based on various criteria within and across selected folders. If you are looking for specific data within a selected transaction, use the Search control on the Transaction Details page.
Transaction Manager also provides a means for business system databases to be searched. See Integrated Transaction Searches.
Column Filtering
At the grid level, columns are equipped with a Filter option under the vertical ellipsis dropdown control. This allows you to apply compound filtering logic that will change which transaction records are displayed on the grid based on which data is retrieved within the column selected.
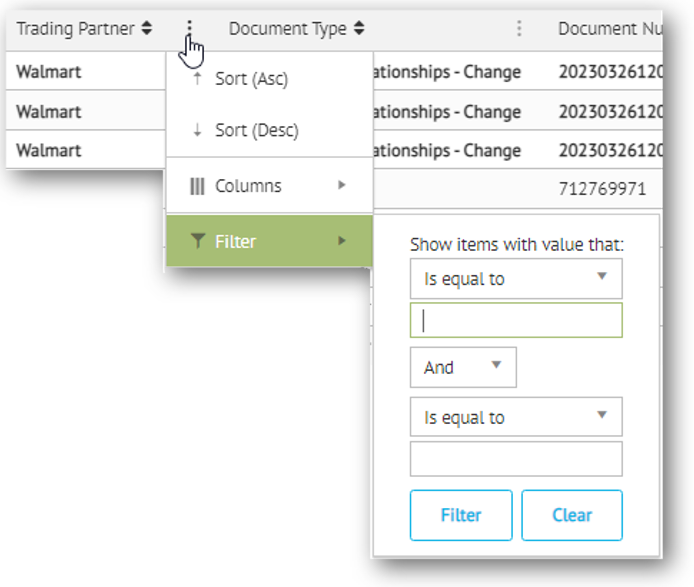
Click Filter to apply filter logic. Click Clear to remove it. Note that column filtering can be used alongside other Custom Grid Settings. This feature can also be found in other Transaction Manager grids, such as the Item Catalog. For more information, refer to the topic Working With Grids in the Platform User Guide.
Quicksearch
For a much simpler way to filter your transaction records use the Quicksearch feature at the top of the grid. While not as powerful or precise, this feature allows you to filter by keyword without having to click into the filtering options of each column.

To perform quick filtering, use the Quicksearch box on the left to type in a full or partial keyword, and then press Enter. Use the dropdown field on the right to select a specific column for the search, otherwise All Quicksearch Columns will be specified by default.
Quicksearch results will show only those transactions that match the text entered. Click the button to remove the current Quicksearch filter.
Search Panel
The button on the action bar expands (and also collapses) the search panel to the right of the workspace. The panel can also be opened by clicking the Search control at the bottom of the Folder Menu to the left of the grid. Use this feature to perform a full search across one or more folders in your transaction database.
![]()
Expand each of these tabs to define your search criteria:
|
Identification
|
Enter a unique document number in the Doc Number field. |
|
Date Range
|
Provide From and To dates of the transaction records to be located. Click the control to select a date from the drop-down calendar. |
|
Transaction
|
Select any number of the EDI IDs and trading partners. Note that selecting an EDI ID automatically selects all related trading partners. |
|
Folders
|
Select any number of folders and sub-folders. The Any option selects all available folders. Selecting a parent folder will automatically select all child folders. |
Once you have your criteria defined using one or more of these fields, click the control inside the search panel to apply the search. The transactions displayed on the page will to reflect your search criteria, provided the data specified is found in your system.
Saving Search Settings
This panel includes controls to clear the search as well as to create transaction "search sets" that you can save and reuse at any time. All Foundry-based applications use this functionality to locate and filter data. To learn more about the Search Panel, refer to the Platform User Guide.
Related Topics