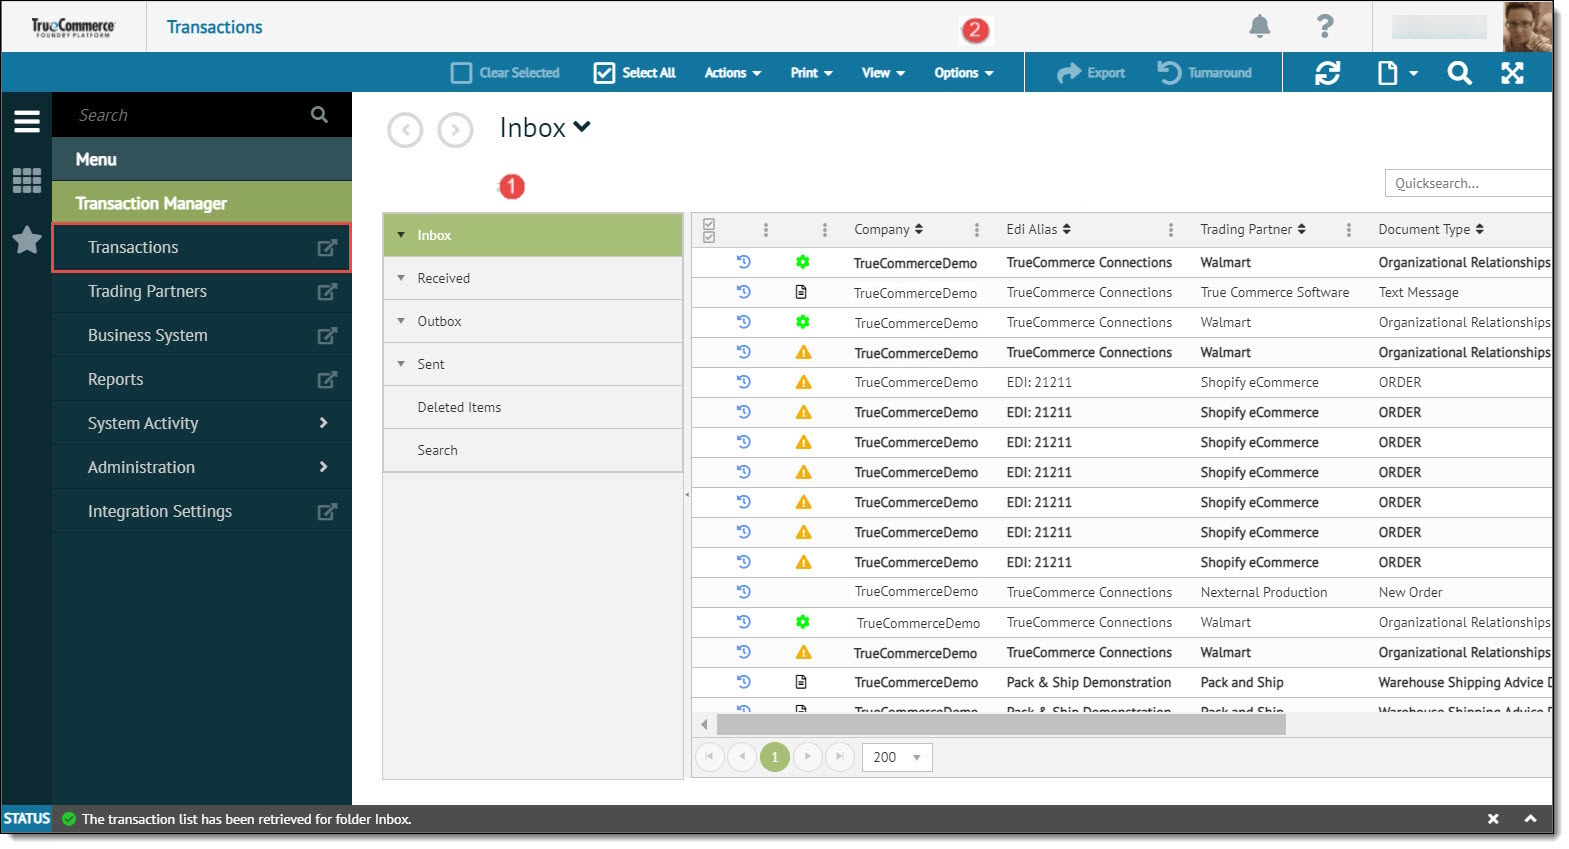
About the Folders Menu
The menu to the left of the Transactions workspace organizes all your transactions based on their state in the transaction process: Inbox, Received, Outbox or Sent. Each folders may also comprise sub-folders defined by the user.
Selecting a folder or sub-folder from this menu automatically displays the associated records in the Transactions Grid to the right.
Additionally, you can click on the Search control at the bottom of the menu to invoke the Search Panel for searching/filtering all EDI transactions in your system.
![]()
The folder you select determines the type of records displayed on the grid.
|
Folder |
Purpose |
|
Inbox |
Inbound transactions received from the trading partners via TC.Net. Certain actions can be taken in the Inbox, such as performing a transaction turnaround and exporting a transaction. Once an action is taken with an incoming transaction, it will automatically move from the Inbox to the Received folder. |
|
Received |
Transactions that were moved from the Inbox, exported to the business system or processed by using Transaction Turnaround. |
|
Outbox |
Transactions for sending to trading partners. Any transactions imported into Transaction Manager from the business system or created within Transaction Manager via transaction turnaround will remain in this folder until you click Send. Records can also be edited in this folder. |
|
Sent |
Transactions that have been sent to the trading partners via the Outbox folder. Records include a date acknowledgement to verify when the Trading Partner received your transaction. Transactions can be moved back to the Outbox if edits need to be made. |
|
Deleted Items |
Transactions deleted from other folders. These records may be restored to their original locations or deleted from this folder to be removed permanently. |
|
Search |
Invokes the Search Panel for search/filtering all your EDI transactions. |
Note that the options in the Action Bar are the same for the Inbox and Received folders, and the same for the Outbox and Sent folders.
If needed, you can also create your own sub-folders to further organize transactions by date, trading partner, and so on. Following are the procedures for creating, renaming and removing user-defined sub-folders for the Transactions workspace.
Creating a Folder
To add a sub-folder:
-
Launch the Transactions workspace and then select the folder to which you want to add a new sub-folder.
-
Click Options on the action bar.
-
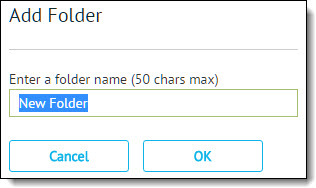
Select New Folder from the dropdown options to launch the Add Folder dialog.
-
Type in the name for your new sub-folder and click OK.

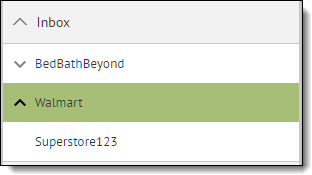
The newly created sub-folder displays under the selected main folder in the transactions menu box.
|
NOTE Sub-folders can be created up to two levels below the default/main folders (Inbox, Received, Outbox, or Send). |
Renaming a Folder
To rename a user-defined sub-folder:
-
Select the sub-folder in the folders menu and then click Options on the action bar.
-
Select Rename Folder from the dropdown options to launch the Rename Folder dialog.

-
Type in the new name for the sub-folder and click OK. The renamed sub-folder displays in the Transactions menu box.
|
NOTE Default/main folders (Inbox, Received, Outbox, or Send) cannot be renamed. |
Removing a Folder
To permanently delete a user-defined sub-folder:
-
Select the sub-folder in the folders menu.
Important. Ensure that the selected sub-folder is empty (of sub-folders and/or transactions) and then click Options on the action bar. -
Select Delete Folder from the dropdown options to launch the Delete Folder dialog.

The dialog includes a warning message confirming permanent deletion the folder specified. -
Click OK to remove the selected sub-folder from the folders menu.
|
NOTE Default/main folders (Inbox, Received, Outbox, or Send) cannot be deleted. |
Related Topics