Mapping Page
To view, add or modify the fields that are mapped for a given document (purchase order, invoice, NSA, etc) select that record from the Partner Maps grid and then click Edit to launch the associated Mapping page.
This section explains the layout and options for viewing and editing field mappings.
|
NOTE Mapping Manager has a locking mechanism to prevent users from editing maps if they are in use by someone else. |
About the Mapping Page
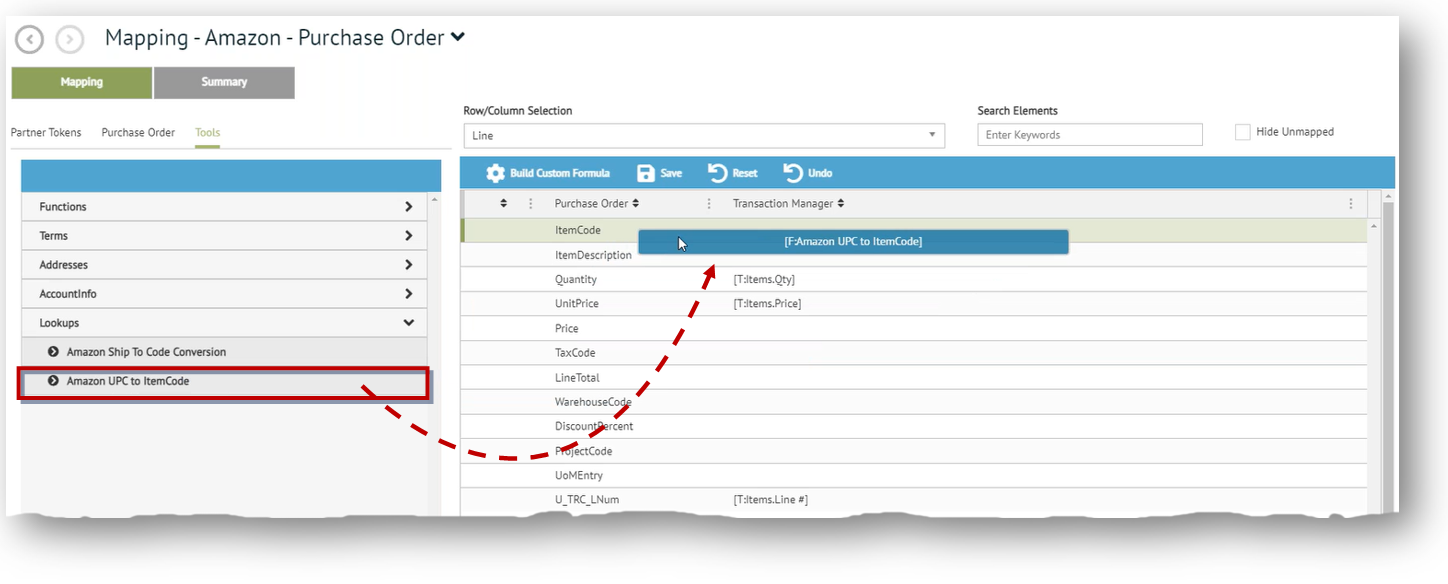
As mentioned, the Mapping page opens automatically once you click Edit on the Partner Maps grid. For example, if you were to select an Amazon Purchase Order for editing, this would launch the map labelled Mapping – Amazon – Purchase Order in the header. By default, this page opens to the Mapping view, which provides access to all the options needed to configure how fields for the selected document are to be mapped.

|
1 Mapping View |
Select the Mapping tab to access the main workspace for editing your map. The split-panel configuration allows you to choose fields and values from the source panel on the left and then apply them to the mapping table on the right. Mapping functionality and options are discussed in the sections that follow. |
|
2 Summary View |
Select the Summary tab to monitor previous activity associated with the currently-selected map. See Mapping Summary for details on the Summary view. |
|
3 Field Tokens & Tools |
Select from the three tabs on the left to access the fields and tools available for building your map. |
|
4 Mapping Area |
Use the mapping area on the right to match selected Transaction Manager fields to ERP fields for the data . |
Field Tokens & Tools
The panel on the left contains the components used in creating or editing your map. Switch between the three tabs at the top to access field definitions and specialized tools, described below.
Partner Tokens
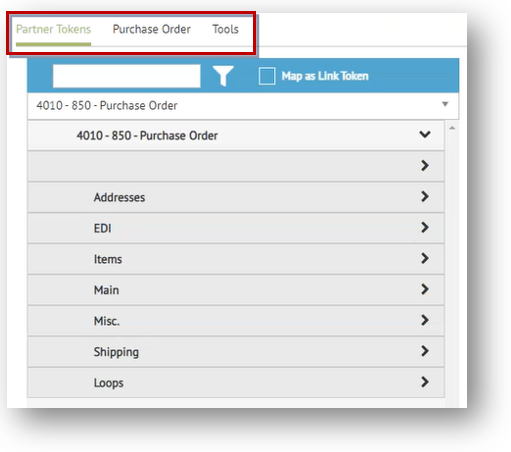
The Partner Tokens tab lists field definitions from the document set up in Transaction Manager for a given trading partner. They align with everything you see on the Transaction Details page in Transaction Manager for the document in question. See Token Mappings for further details.
![]()
![]() Transaction Definition
Transaction Definition
The middle tab pertains to the document (entity) named in the page header ("Purchase Order" in the example above). The fields listed here reflect the transaction elements available for editing on the grid. Export definitions are the EDI fields for exporting from Transaction Manager. Import definitions are the ERP fields for importing into Transaction Manager.
Tools
The Tools tab supplies various logic and parameters can be applied to your mapping configurations:
Functions – Lists functions that can be applied to the mapping logic.
Terms – Parses out the individual terms fields required on an EDI transaction, based on the invoice date and the terms description being passed in on an import into Transaction Manager. This is most commonly used for invoices being imported into Transaction Manager.
Addresses – For when trading partners want to reduce the number of characters being sent in an EDI transaction. The address code is converted to your actual address by your trading partner's EDI system. Address codes can be entered into the Address table. They can be either store codes or distribution center (DC) codes.
AccountInfo – Defines the Project on which integration to use.
Lookups – Corresponds with Lookup Tables in Transaction Manager. These are custom translation tables that can be built based on any criteria of a transaction and used in both importing and exporting activity with Transaction Manager.
For more documentation, see Mapping Tools.
Mapping Area
The two-column grid on the right side of the page is for creating and editing specific mappings based on the fields and tools pulled in from the left.
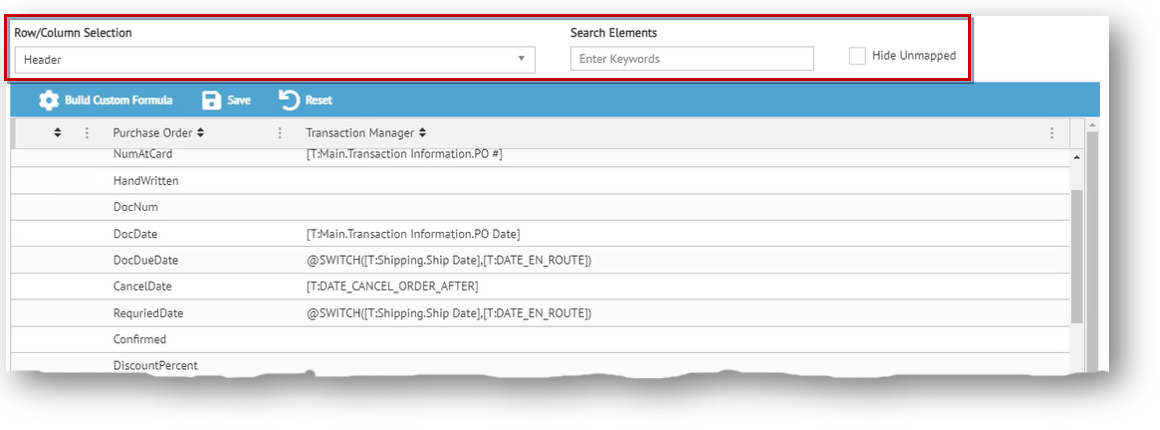
Each row represents a different mapping of the transaction fields between your ERP project and Transaction Manager. Columns indicate the direction of the map according to its import or export category type on the Partner Maps page. The first column of each row represents the destination to which you are passing values. The second column of each row represents the source from where you are retrieving values.
Using the Grid
Use the Search Elements search box and/or Hide Unmapped option to search/filter the mapped components displayed on the grid. If you are pulling values from Transaction Manager you can also use the Row/Column Selection box to filter records. Required fields should already be listed on the grid whether or not they include the code elements necessary for mapping.
Editing Token Mappings
You can click on a record to make it editable. Following are the different ways you can add or insert elements and values when editing/creating field-token mappings on the Mapping grid. As mentioned, the second column of a field-token definition is where your code elements (instructions) can be added for importing or exporting data.
-
For import mappings, required fields from the template should already be listed on the grid. To add a new field definition to your map, open Partner Tokens (first tab) and then click on the control of the selected field. Methods for editing the newly-added definition are explained next.
-
To apply elements from the ERP document tokens (middle tab) or from Tools (third tab), click on the control or drag and drop them directly into the definition you are editing.
-
You can also enter hard-coded values and/or add special tokens directly into the definition text box. See Custom Formulas.
-
Click Save on the grid control bar to commit your changes.
-
For deployment to Transaction Manager, click Deploy on the Action Bar.
|
IMPORTANT If you receive the message that mapping values are in use by another user, please consult that user before proceeding with deployment. See Multi-User Access for more information. |
Example Mappings
Following are some examples of token mappings that may be displayed on the Mapping grid.
Project
[R:1.5 Header.CustPONo] (Row Based) or [C:5. Purchase Order Number] (Column Based)
Transaction Manager
[T:Main.Invoice Information.PO #]
Lookup Tables
[F:Ship To Code]
Transaction Manager Setup
[I:Account ID]
Transaction Manager Address
[A:Ship To.Name]
Terms
[D:Discount Days Due]
If necessary, you can also build a custom row/line function via Custom Formulas.
What can I do?
-
Create or modify field-token definitions for Import or Export.
-
Create Lookup Tables for use in mapped components.
-
Check out the Mapping Summary for a mapped document.
Related Topics